 |
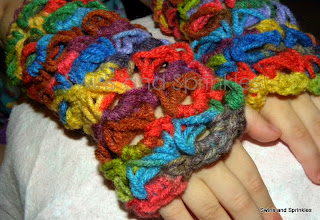
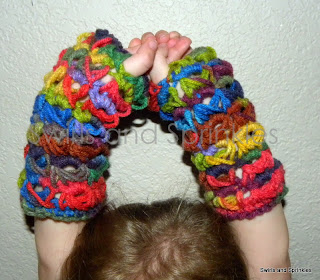
| Broomstick Lace Fingerless Gloves |
Something I realized while trying to learn the stitch is that there are multiple ways people make the stitch. I found youtube videos with working your piece with the RS (right side) facing at all times, working right to left, then left to right. I found vidoes with turning after each row...both give a similar look, though I prefer keeping the RS facing at all times. It gives a smoother more uniform look (IMO). Some have you work in both loops of the stitch, some have you work in the BLO (back loop only).
I found while creating this pattern that I had some choices to make. Choice one, I could work around my piece right to left, then work back left to right, or I could work my piece in a continuous round right to left. I chose the latter. I found it to feel more natural, though both ways give the same overall look. Choice two, I could work in both loops of the stitch, or I could work in the BLO, I chose both loops.
If you are familiar with the stitch, go with what you feel comfortable with. If you have never used this stitch, I would highly suggest taking a look at this video tutorial by Moogly, so you can at least get an idea for what each step will look.
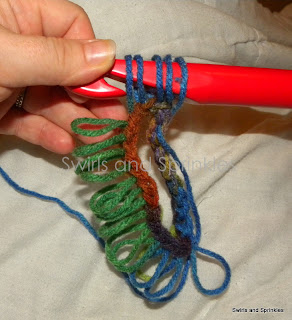
I did take some extra photos trying to show some steps of the stitch. I hope you find them helpful!
Are you ready? Ok, here we go...
You may not copy, change, or sell my patterns in part or in whole. You may sell your finished product, but I ask that you give credit for the pattern by linking back to me.
In this pattern I worked in multiples of 4. Each grouping is 4 loops with 4 sc. If you want to increase the size, just be sure to increase in multiples of 4.
What you will need:
H hook
S hook (Large knitting needle, large crochet hook, broomstick, small pvc pipe, or what ever else you can think of to use.)
Ww yarn
Scissors
Yarn needle
Abbreviations:
ch-chain
sc-single crochet
st/st's-stitch/stitches
Using your H hook
Ch 24, join.
Round 1: Ch 1, 1 sc in each ch around. Join with first sc. (24 sc)
In some broomstick lace tutorials, you work your flat piece continuously with the right side facing, working right to left, then left to right. HOWEVER, I worked these fingerless gloves in a continuous round right to left.
Round 2: Draw up a loop and place it on your “broomstick” (my S hook).
 |
| In this pic I have already drawn a few loops. |
Insert hook into next st, draw up a loop and place it on your "broomstick"
 |
| Remember, I am working right to left, so your next stitch is to the left of your previous stitch |
Repeat around for each sc around for a total of 24 loops.
*note* About halfway through, I off-load my first loops, leaving about 3 or 4 on my “broom stick”. I then proceed to finish the rest of my loops.
 |
| Removing loops from the back of my hook. |
Once you have a total of 24 loops made, insert hook into first 4 loops made, ch 1, 4 sc into loops
 |
| First grouping |
 |
| ch 1 in first grouping |
 |
| 4 sc in loops. 1 grouping made |
At this point I removed the remaining loops from my hook.
*Insert hook into next 4 loops, 4 sc into loops*. Repeat 4 more times.
After you finish your last grouping of the round, join with the first sc of the round with a sl-st.
Repeat Round 2, 6 more times, or until you reach your desired length.
 |
| Finished! |


Hi and wow those handwarmers are so pretty! I saw it on crochet happy.
ReplyDeleteJulie from julieslifestyle.blogspot.com
Thank you for linking up at Link & Share Wednesdays :) and thank you for this tutorial! Rhondda
ReplyDeletei absolutely love the gloves i made using your pattern! thank you.
ReplyDeleteSo glad you enjoyed the pattern!!
Delete